Quick Start
Get started with AI Sales Service in 5 minutes
Prerequisites
- Active AI Sales Service account
- At least one email account connected
- A list of leads to contact
Steps
1. Connect Your Email
Navigate to Settings > Email Accounts and connect your business email.
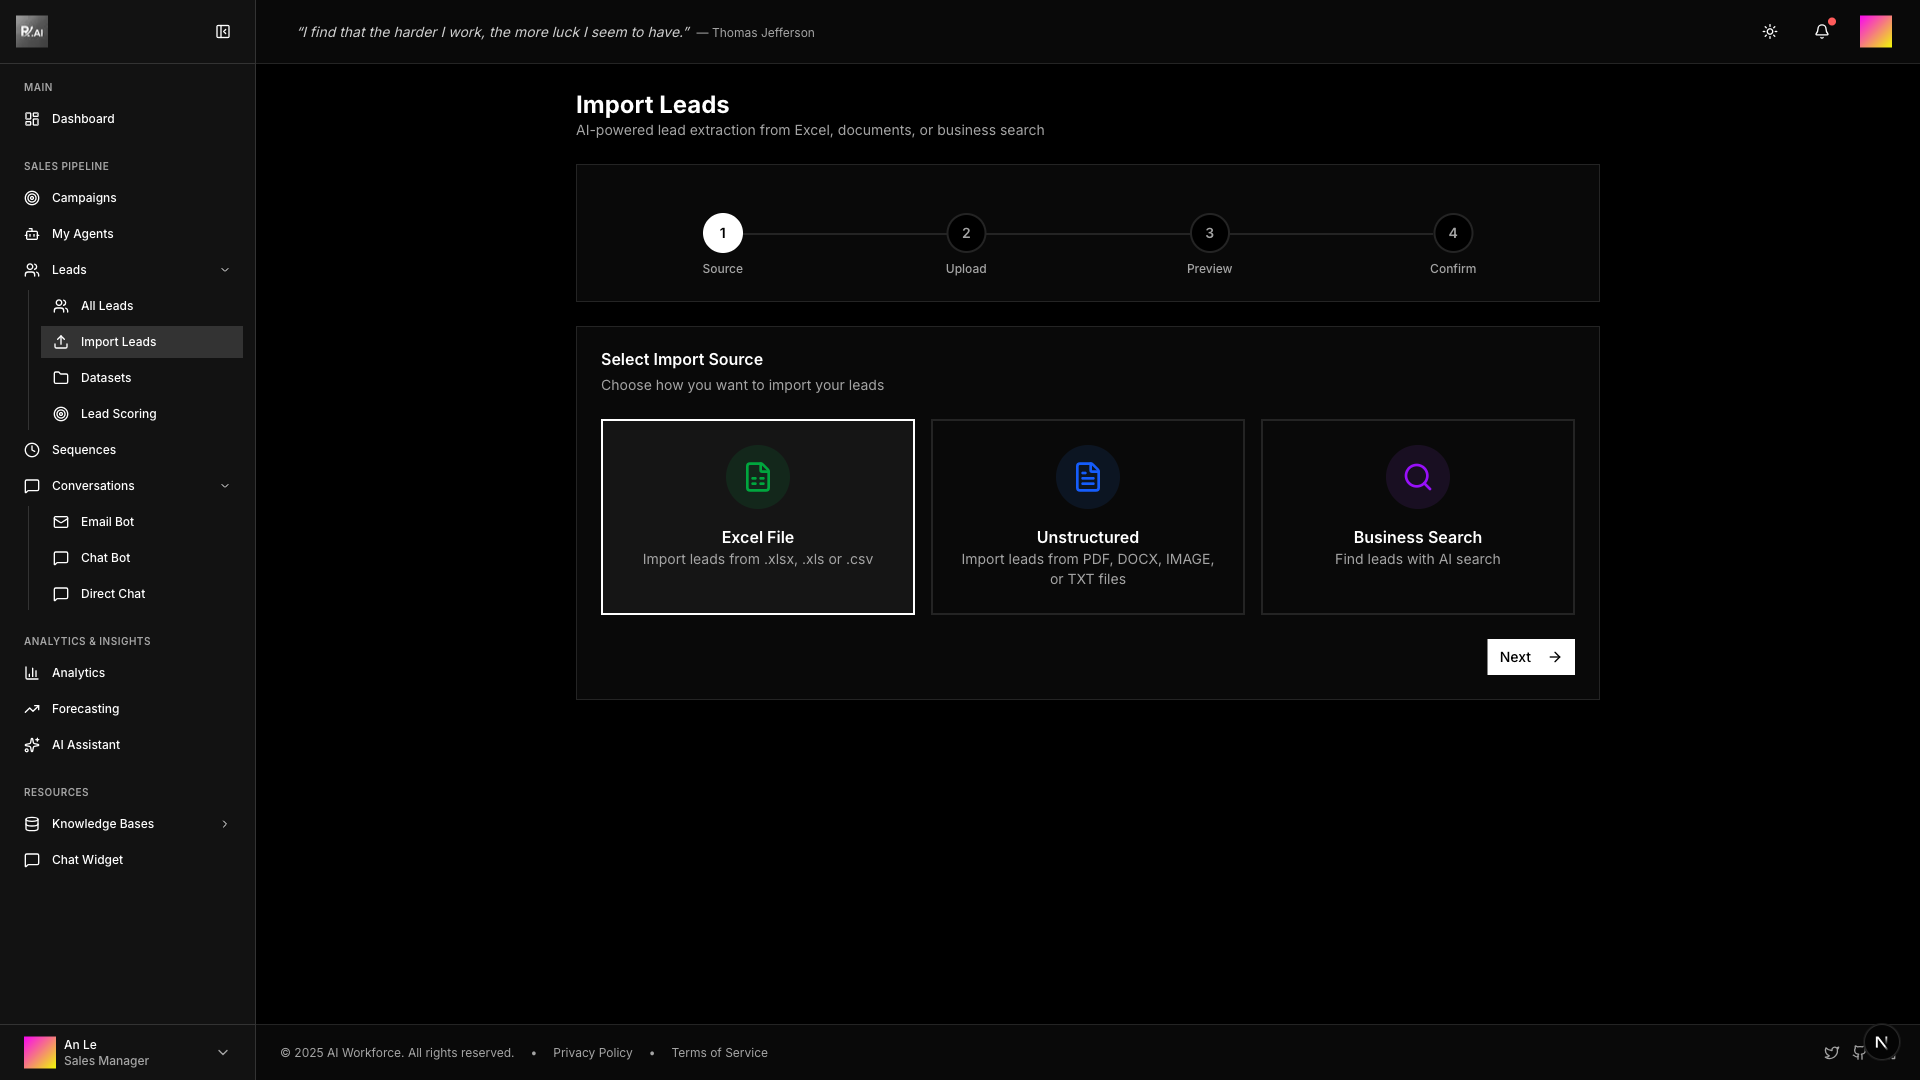
2. Import Leads
Go to Leads > Import and upload your CSV file with contact information.
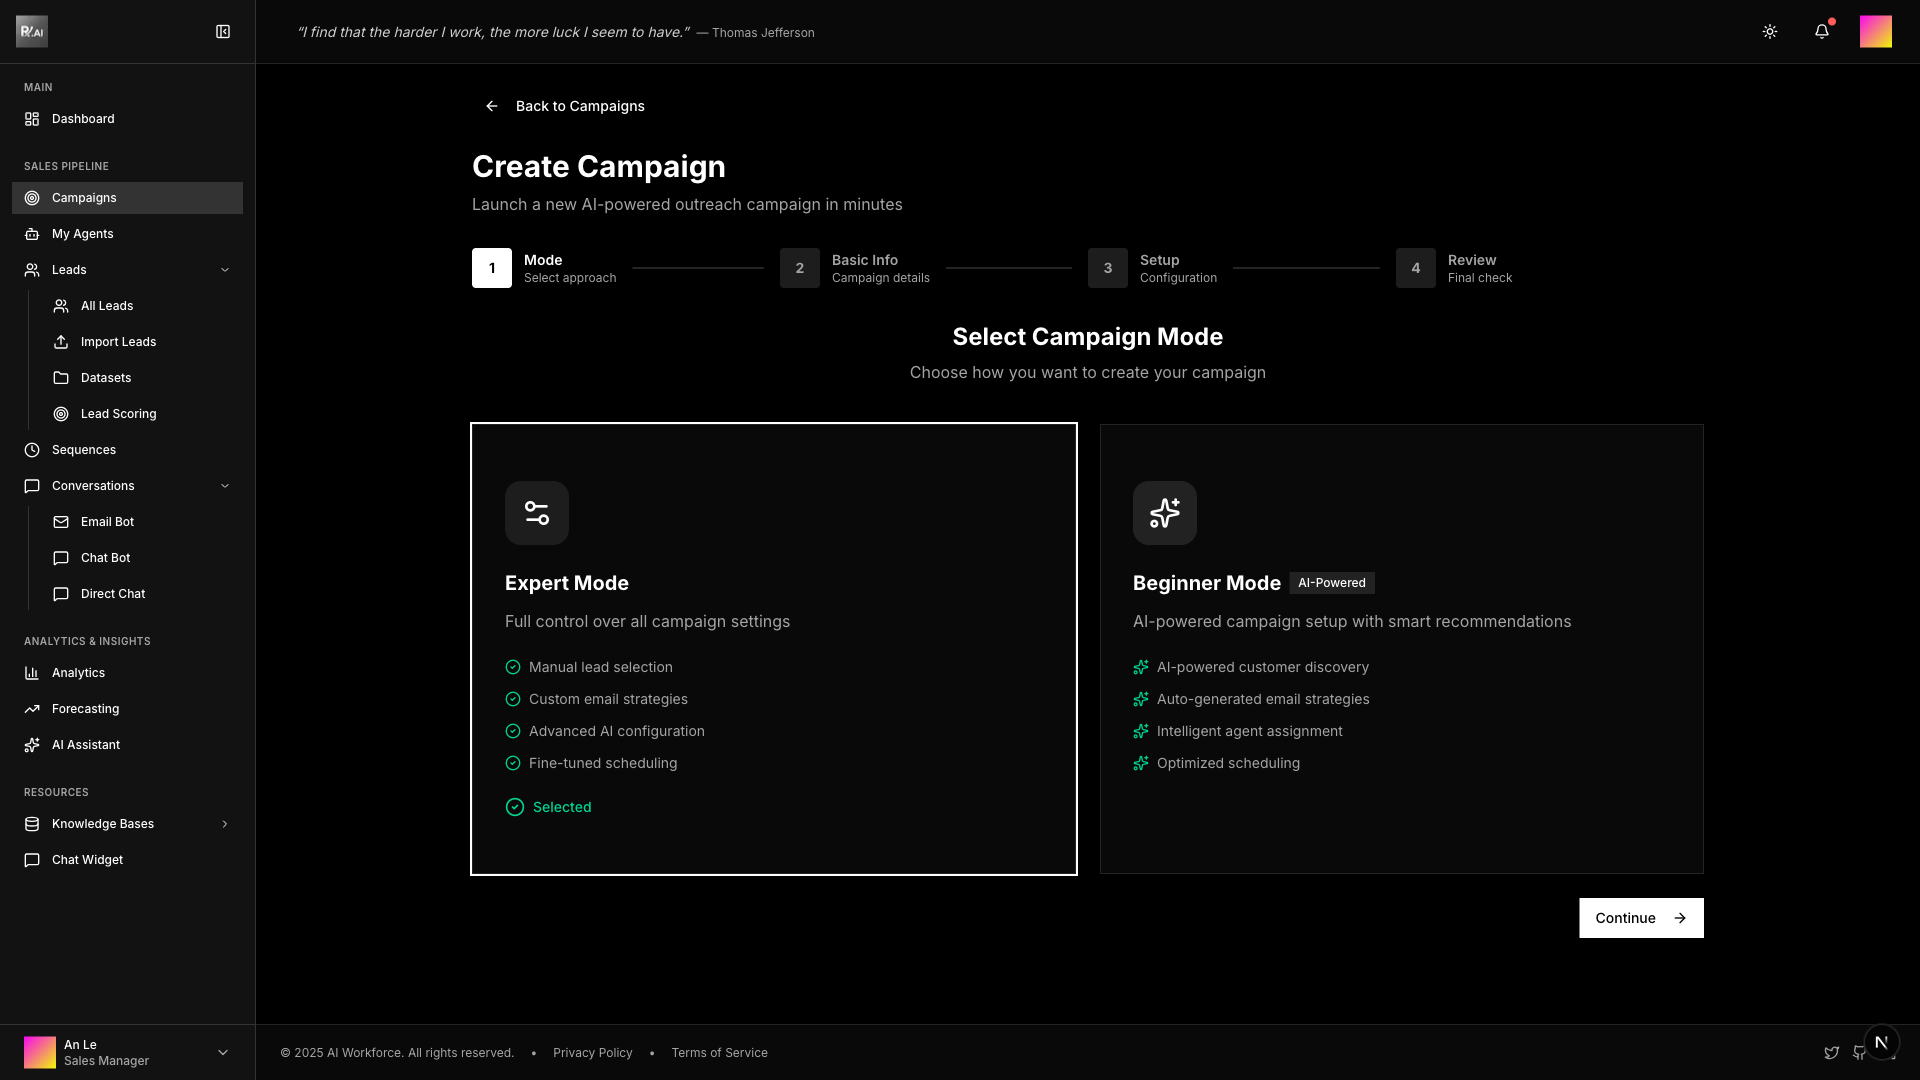
3. Create a Campaign
Click Campaigns > New Campaign and choose your creation mode:
Choose Your Mode
Expert Mode - Full control over all campaign settings:
- Select lead datasets and knowledge bases manually
- Configure email accounts and AI agents
- Set up detailed email strategy (sending schedule, templates, follow-ups)
- Best for: Experienced users who want granular control
Beginner Mode - AI-powered campaign creation:
- Describe your campaign idea in natural language
- AI automatically configures optimal settings
- Guided step-by-step wizard
- Best for: New users or quick campaign setup
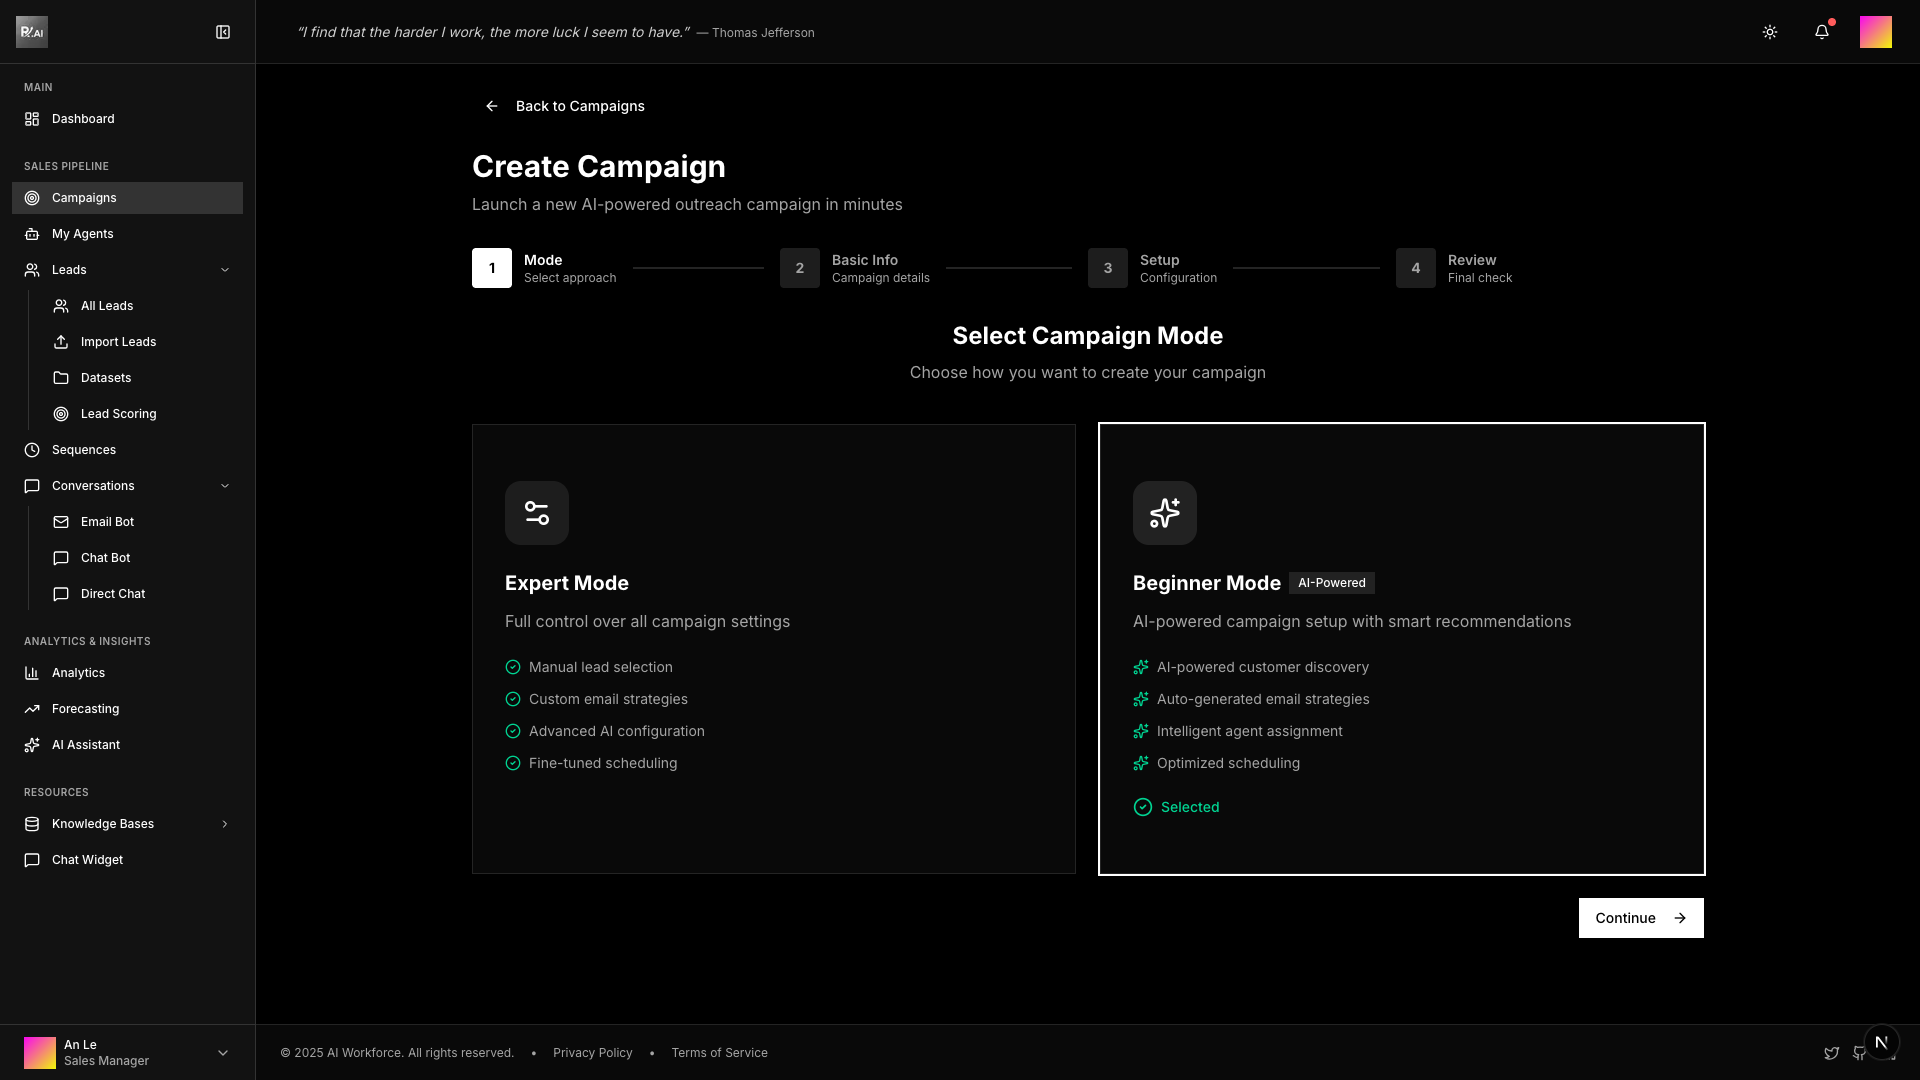
After selecting your mode, click Continue and fill in the campaign details.
4. Launch Your Campaign
After creating your campaign, it starts in Draft status. Follow these steps to launch:
Step 4a: Mark as Ready
From the campaign detail page, click Mark Ready to indicate your campaign is configured and ready for launch.
Step 4b: Start Campaign
Once in Ready status, click Start Campaign to begin sending emails.
Campaign Status Flow:
- Draft → Configure and review settings
- Ready → Campaign verified, awaiting launch
- Running → Actively sending emails
- Paused → Temporarily stopped (can resume)
- Finished → Campaign completed